UV curing is a key driver of print quality, efficiency, and process stability in label printing. This guide focuses on flexo label printing, but the principles apply to gravure and narrow-web presses as well. It covers both traditional UV and LED curing. You’ll find practical steps to set curing parameters, measure results, and troubleshoot common issues. The goal is a repeatable, production-ready recipe for reliable cures across different substrates, inks, and coatings.
Understanding UV Curing in Label Printing
UV curing uses light-activated chemistry. Inks and coatings contain photoinitiators that start polymerization when exposed to UV radiation. The result is a hard, insoluble film that resists scuff, solvent, and abrasion. Key factors influence cure quality:
- Ink chemistry and film thickness. More opaque or thicker films require more energy to cure through.
- Substrate surface energy and pretreatment. A good bond helps cure performance and finish.
- Oxygen inhibition at the surface. Oxygen can slow surface cure, affecting tack and gloss.
- Exposure conditions. Intensity, time, and distance from the lamp determine the energy delivered.
- Post-cure behavior. Some inks continue to cure slightly after the initial exposure.
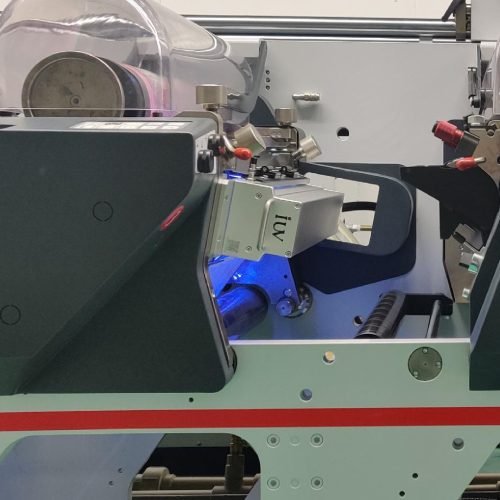
Lamp Technology: LED vs Mercury Vapor
Two main lamp technologies power UV curing units in label presses:
- LED-UV: Narrow spectral bands (commonly around 395–420 nm, some broader systems). Benefits include instant on/off, low heat, long life, and no ozone. Good for fast job changes and heat-sensitive substrates. Requires inks and coatings formulated for the LED spectrum.
- Mercury vapor (traditional UV): Broad-spectrum light, strong cure potential, but generates more heat and requires warm-up. Replaceable bulbs have a finite life, and ongoing ozone considerations may apply.
Both systems can achieve strong cures when properly tuned. The choice often depends on substrate compatibility, ink chemistry, and production demand.
Core Parameters to Set
Cure performance hinges on a few interrelated variables. The practical goal is a through-cure that leaves no tack, resists blocking, and preserves gloss and adhesion.
1) Irradiance and dose
- Irradiance: the light power received per area (mW/cm2). Higher irradiance lowers exposure time.
- Dose: the total energy per area (mJ/cm2). Dose = irradiance × exposure time (or distance-adjusted speed on a web press).
- Practical approach: start with the supplier’s recommended dose range for the ink system. Then verify with dosimetry on representative print panels.
2) Exposure time and line speed
- Line speed determines how long a given area stays under the lamp. Faster speeds require higher irradiance or multiple passes to achieve the same dose.
- For single-pass curing, ensure the lamp intensity and distance deliver the required dose within the available dwell time.
- For multi-pass or interpanel curing, plan sequential curing zones with appropriate gaps to avoid over-curing or under-curing.
3) Lamp-to-substrate distance and belt/roller geometry
- Distance impacts irradiance uniformity. A closer position increases energy density but can raise heat and cause nonuniform cures if the web shudders.
- Ensure consistent transport so the ink film remains flat and evenly exposed.
- In narrow-web presses, small positional variances matter more. Use calibrated adjustments and alignment checks.
4) Ink film thickness and overprint coatings
- Thicker ink films absorb more energy; poor through-cure often occurs at the base layer if energy is insufficient.
- Overprints, white layers, and clear varnishes require additional cure dose or adjusted sequencing (e.g., pre-cure of the white, then cure of the color, then post-coating cure).
- Metallic or pearlescent inks can behave differently; check with the supplier for recommended doses.
5) Substrate type and surface energy
- Film stocks, foils, and label papers vary in absorbency, transparency, and adhesion. A high-gloss surface may reflect some energy, reducing effective dose.
- Some substrates benefit from surface pre-treatment or a thin primer layer to improve cure uniformity.
6) Temperature and heat management
- UV systems generate heat that can affect substrate behavior and ink viscosity. LED systems tend to be gentler, but heat management remains important.
- Excess heat can cause coating flow or substrate deformation. Balance cure with substrate tolerance.
Ink and Substrate Considerations
- Choose inks formulated for the chosen lamp spectrum. LED-curable inks are efficient with LED lamps; mercury-curable inks are tuned for broad-spectrum lamps.
- White inks, opaque coatings, and gloss finishes each demand tailored cure programs. Whites often need extra energy to achieve full cure through the film.
- Topcoats and varnishes may cure at a different rate than base inks. Plan sequential curing if needed.
- Paper and film labels respond differently to cure. Conduct trials on the actual stock used for production.
Step-by-Step Practical Setup
1) Establish a baseline
- Gather the ink set for a typical label: a color run, white, and a clear varnish or protective coating. Include a standard overprint.
- Read the ink and coating datasheets for recommended cure ranges and lamp types.
2) Install and verify dosimetry
- Place a calibrated UV dosimeter in a representative print area at the center of the substrate.
- Run a few test patches at a low speed or low dose to establish a baseline cure reading.
- Record irradiance and dose values for reproducibility.
3) Create a test pattern for a cure window
- Print test panels with varying exposure settings (different speeds, distances, and lamp zones).
- Include plain ink, white, and overprint varnish samples.
- Allow time for a true post-cure assessment if relevant.
4) Evaluate cure quality
- Look for tack resistance by touching the surface after a brief dwell. No tack means surface cure is achieved.
- Check optical attributes: gloss uniformity, pinhole absence, and coalescence.
- Perform a simple rub test to gauge abrasion resistance. A good cure should resist smudge under light pressure.
- Check adhesion with a standard tape pull or similar test to ensure the ink adheres well to the substrate.
5) Adjust parameters iteratively
- If tack is present, increase the dose by raising irradiance, reducing speed, or reducing the distance slightly.
- If gloss is poor or there is orange peel, adjust dose or check for ink-film balance. Sometimes a slightly higher dose with a smoother substrate yields better gloss.
- If there is edge-lighting or banding in the cure, inspect lamp uniformity and spot-check radiometer readings across the web. Correct any hot spots or dark zones.
6) Validate with production-like conditions
- Run a full panel at normal production speed with the chosen settings.
- Inspect multiple samples across the run for consistent cure. Document any drift or variations.
Quality Assurance and Troubleshooting
- Tack persists after cure: increase dose, or verify that the substrate isn’t absorbing too much energy. Check for multiple curing zones or pre-curing steps.
- Excessive hardening or cracking in coatings: reduce dose or adjust interlayer curing timing. Some coatings cure too aggressively when applied too thick.
- Yellowing or color shift: check ink chemistry compatibility with the lamp spectrum and ensure the substrate is stable under UV exposure.
- Blocking between labels: verify cure depth and surface finish. A fully cured surface reduces tack and reduces sticking risk.
- Dimensional changes or warping: ensure heat management is adequate and that the substrate can withstand cure temperatures.
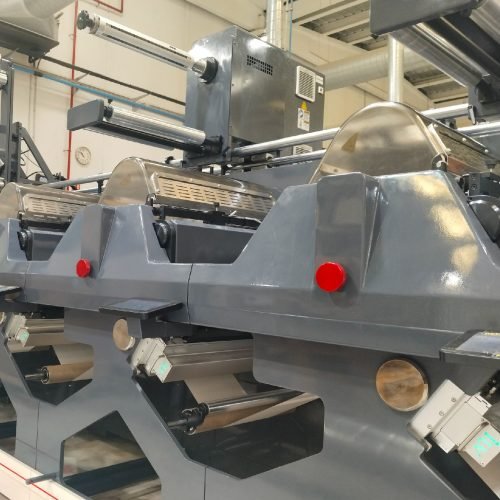
Process Variants: Flexo, Gravure, Narrow-Web
- Flexo label printing: Commonly uses faster web speeds and higher ink loading. The cure system must handle thick, layered inks and possible white layers. Plan for multi-layer cure in the sequence: base color, white underlay, then topcoat.
- Gravure: Often uses high-solids inks with dense pigment. Through-cure is critical; ensure adequate dose to penetrate the thick cells. Slightly higher dose may be necessary compared to flexo.
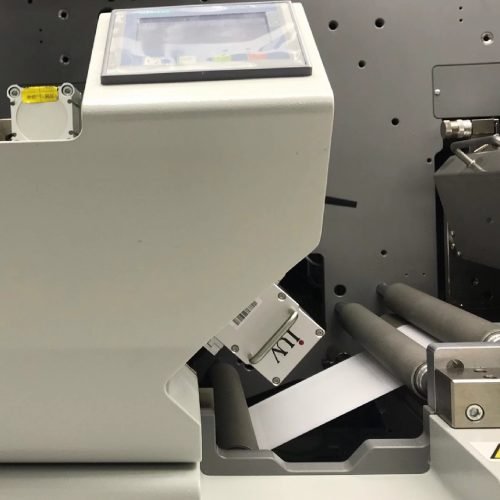
- Narrow-web: Small form factor raises demands on lamp uniformity and precise alignment. Use dosimetry across the web width to confirm uniform cure. OLED-like variability across the narrow width should be minimized.
LED Curing in Narrow-Web Label Printing
- LEDs excel on narrow-web due to rapid start-up, low heat, and minimal energy waste. They are well-suited to fast changeovers and thin ink films.
- Ensure the LED spectrum matches the photoinitiators in your inks. If a certain color requires a specific wavelength, verify compatibility with the ink line.
- Use a dosimeter to map irradiance across the web and address any hot or cold spots. Small cure variations can show up as color shifts or tack in fine text.
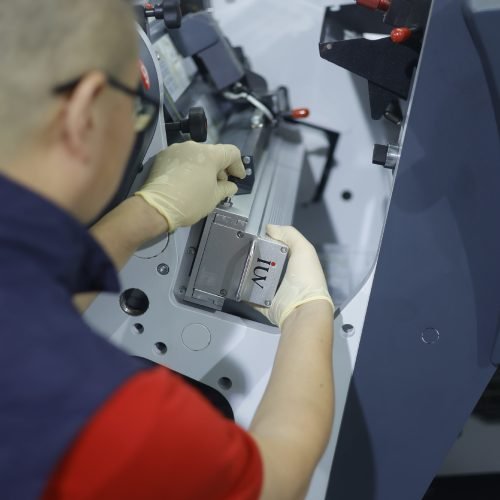
Maintenance and Safety
- Regularly inspect lamps for brightness uniformity. Replace aging lamps promptly.
- Clean protective windows and reflectors so light reaches the substrate efficiently.
- Check cooling systems. Overheating reduces cure quality and shortens lamp life.
- Follow safety guidelines for UV exposure. Use shielding and personal protective equipment as required.
Documentation and Recipe Management
- Document cure settings for each job: lamp type, irradiance, dose, distance, speed, substrate, ink set, and post-cure steps.
- Create a job-specific cure window. Record any deviations observed during trials so future runs can reproduce results.
- Update standard operating procedures (SOPs) as ink formulations or substrates change.
Conclusion
Setting UV curing parameters for flexo label printing, gravure, and narrow-web processes is a balance of ink chemistry, substrate behavior, lamp physics, and press mechanics. Start with the ink supplier’s recommendations, verify with dosimetry, and refine through controlled trials. A tight cure window yields reliable rub resistance, dimensional stability, and print gloss, while reducing rework and waste. With careful setup, ongoing QA, and disciplined documentation, UV curing becomes a predictable, controllable part of the label production line.