Reverse printing on flexible films presents a unique set of challenges for narrow web converters. Unlike surface printing, the ink resides between the substrate and the adhesive or laminate. This configuration demands absolute ink adhesion and complete polymerization. If the UV curing process fails even slightly, the integrity of the entire package is compromised.
In label printing and flexible packaging, “good enough” curing leads to ink pick-off, odor issues, and migration. Achieving peak performance requires a deep understanding of how UV energy interacts with filmic substrates like PET, BOPP, and PVC.
The Mechanics of Reverse Printing on Film
Reverse printing involves applying graphics in a mirrored format on the underside of a clear film. The viewer sees the image through the substrate. This technique provides a high-gloss finish and protects the graphics from scuffing or chemical exposure.
However, this method creates a barrier for UV light. In many cases, a heavy opaque white is printed last to provide a background. This white layer must be cured through, or the primary colors must be cured before the white is applied. The sequence of curing determines the final bond strength.
Substrate Preparation: The Foundation of Adhesion
Before discussing lamps or wavelengths, we must address surface energy. Most films are non-porous and chemically inert. UV inks naturally struggle to wet out on these surfaces.
- Check Dyne Levels: Ensure the film has a surface energy of at least 38 to 42 dynes/cm.
- In-Line Corona Treatment: Most narrow web flexo presses utilize corona treaters. This process creates polar groups on the film surface, increasing the “hooking” points for the UV ink.
- Temperature Control: Cold films coming from a warehouse can cause condensation. Ensure the substrate is at pressroom temperature to avoid microscopic moisture layers that block the UV bond.
Step 1: Selecting the Right UV Ink Chemistry
Not all UV inks are equal. For reverse printing on films, the ink must balance flexibility with adhesion.
- Shrinkage Control: Standard UV inks shrink significantly during cross-linking. On thin films, this causes “curling” or “quilting.” Look for low-shrinkage formulas specifically designed for flexible substrates.
- Pigment Loading: Reverse printing often requires high-density colors. However, high pigment loads block UV light from reaching the bottom of the ink film. Work with your ink supplier to find the highest opacity that still allows for deep-layer curing.
- Photoinitiator Packages: Ensure the ink is tuned to the specific light source. An ink designed for mercury arc lamps will not cure properly under LED UV systems due to the narrow spectral output of LEDs.
Step 2: Optimizing the UV Curing Source (Mercury vs. LED)
The choice between traditional Mercury Arc lamps and LED UV systems changes your optimization strategy.
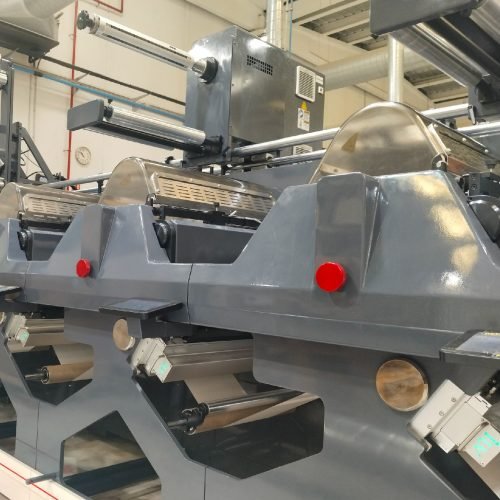
Traditional Mercury Arc Lamps
Mercury lamps provide a broad spectrum of light (UVA, UVB, UVC, and UVV). The UVC wavelengths are excellent for surface “tack-free” curing. However, mercury lamps generate significant infrared heat. For thin films like 20-micron BOPP, this heat can cause stretching and registration issues.
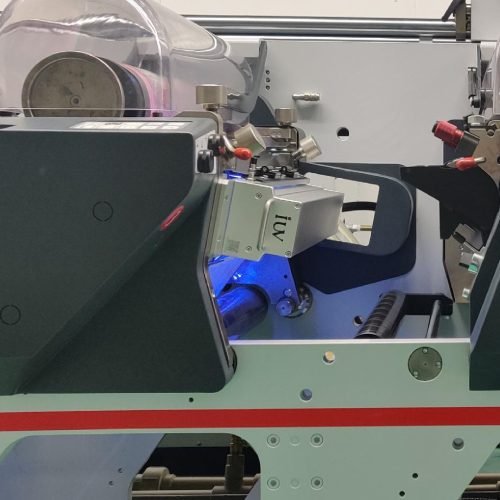
LED UV Systems
LED UV curing is becoming the standard for narrow web and label printing. LEDs emit a concentrated 395nm or 385nm wavelength. This long-wave UVA penetrates deep through thick ink layers and opaque whites, which is perfect for reverse printing. Since LEDs do not emit IR, the film remains cool and dimensionally stable.
Step 3: Managing the Opaque White Layer
The “back-up” white is the most difficult layer to cure in reverse printing. If the white is under-cured, the entire ink stack can delaminate from the film during the slitting or rewinding process.
- Split the Load: Instead of one heavy pass of white, consider two thinner passes with intermediate curing. This ensures the first layer is fully anchored to the substrate.
- Wavelength Penetration: Use 395nm LED lamps for the white station. The longer wavelength passes through the titanium dioxide pigments more effectively than shorter UV waves.
- Reflector Maintenance: If using arc lamps, ensure the dichroic reflectors are clean. Dirty reflectors scatter light and lose the focus needed to penetrate dense whites.
Step 4: Calibrating Dose and Irradiance
Optimization is impossible without measurement. You cannot rely on the “thumb test” to verify cure for high-end applications.
- Irradiance (W/cm²): This is the intensity of the light at the surface. High irradiance is needed to initiate the chemical reaction.
- Dose (mJ/cm²): This is the total energy the ink receives. It is a function of intensity and press speed.
- The Dynamic Range: Use a radiometer (like an EIT PowerMap) to map the UV output across the web. Ensure the energy is consistent from the operator side to the gear side.
- Set a Baseline: Once you achieve a perfect cure at a specific speed (e.g., 100 m/min), record the millijoule readings. This becomes your “Process Window.”
Step 5: Oxygen Inhibition Management
UV curing is a radical polymerization process. Oxygen in the air can “quench” the reaction at the surface of the ink, leading to a greasy or tacky finish.
In reverse printing, the “bottom” of the ink (touching the film) is protected from oxygen. However, the side facing the next print station is not.
- Nitrogen Inerting: For high-speed narrow web applications, some converters use nitrogen chambers to displace oxygen. This allows for faster speeds and reduces the amount of expensive photoinitiators required in the ink.
- Lamp Focus: Ensure the UV light is focused directly on the web. Scattered light loses the intensity needed to overcome oxygen inhibition.
Step 6: Testing and Validation Protocols
Optimization is only successful if it is repeatable. Implement a rigorous testing cycle for every job.
- The Cross-Hatch Tape Test: Use specialized tape (like 3M 610) to check adhesion. Perform this test immediately after curing and again 24 hours later, as some UV inks “post-cure.”
- Sutherland Rub Test: Verify the ink’s resistance to abrasion.
- Crinkle Test: For flexible films, fold and twist the film to see if the ink flakes. If it flakes, the ink is likely too brittle or under-cured.
- Odour Check: Under-cured ink has a distinct, pungent smell. This is a sign of unreacted monomers. If you can smell the ink, it is not fully cured.
Troubleshooting Common Issues in Reverse Printing
Ghosting and Set-off
If the ink transfers to the back of the film when wound into a roll, you are dealing with under-curing or excessive heat. Lower the lamp power (if using mercury) or increase the dose. Ensure the chill rollers are functioning to set the ink temperature before rewinding.
Low Gloss or “Orange Peel”
This is often a result of poor wetting. If the UV ink is cured too quickly before it has a chance to level out, it creates a textured surface. Adjust the distance between the print head and the UV lamp to allow for a few milliseconds of “flow out.”
Delamination After Lamination
If the reverse-printed film is being laminated to another layer, the bond strength depends on the UV cure. Under-cured ink acts as a “weak link” in the sandwich. If the lamination fails, check the UV dose on the primary ink layers.
The Future of the Process: LED and Smart Monitoring
The industry is moving toward “closed-loop” curing. Modern narrow web presses now feature sensors that monitor UV output in real-time. If a lamp starts to degrade, the system automatically slows the press speed or alerts the operator.
Transitioning to LED UV is the most effective way to optimize reverse printing on films. The combination of deep penetration, low heat, and instant on/off capability eliminates most of the variables that plague traditional mercury systems.
Conclusion: Data-Driven Curing
Optimizing UV curing for reverse printing is not a “set and forget” task. It requires constant monitoring of dyne levels, lamp intensity, and ink chemistry. By shifting from subjective testing to objective radiometer data, converters can increase press speeds and eliminate costly rejects.
The focus must always remain on the ink-to-substrate bond. When the chemistry and the light source are perfectly synchronized, the result is a vibrant, durable, and high-performance label that meets the most demanding industry standards.