High-speed production in the modern printing house demands more than just color accuracy. Brand owners now expect tactile experiences, high-gloss finishes, and chemical resistance that only UV-cured coatings can provide. Whether you operate a narrow-web flexo press for labels or a large-format offset machine, mastering inline UV curing is the difference between a premium product and a scrapped batch.
Managing this process requires a deep understanding of the interaction between chemistry, light physics, and mechanical precision. This guide breaks down the technical requirements for achieving a perfect cure every time.
Understanding the Inline Coating Environment
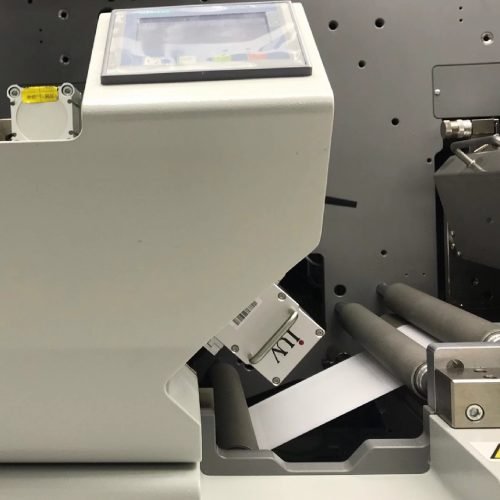
Inline coating integrates the finishing stage directly into the printing pass. In flexographic and offset setups, the coating unit usually sits after the final color station. For narrow-web label printers, this often involves a dedicated varnishing station before the die-cutting unit.
The primary challenge of inline curing is speed. You have a fraction of a second to transform a liquid monomer into a solid polymer. Unlike offline coating, you cannot easily adjust the dwell time without changing the entire press speed. This makes the synchronization of lamp output and web speed a fundamental requirement.
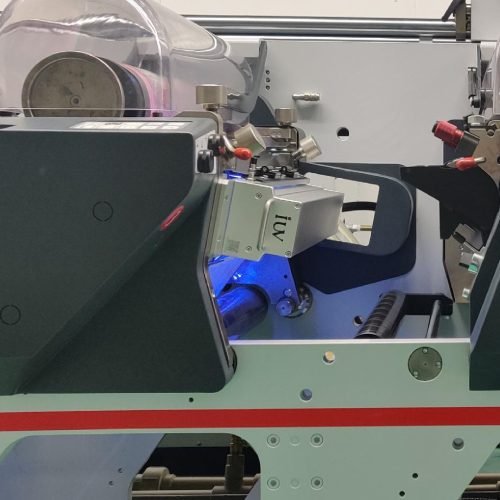
Selecting the Right UV Technology: Mercury vs. LED
For decades, medium-pressure mercury vapor lamps were the industry standard. They emit a broad spectrum of UV light, including UVC, UVB, and UVA. This broad range is excellent for surface curing and achieving high-gloss finishes in varnishes. However, they generate significant heat, which can distort thin films in narrow-web applications.
LED UV technology has shifted the landscape. LED lamps emit a narrow wavelength, typically 385nm or 395nm. They are incredibly efficient and generate almost no infrared heat on the substrate. The catch lies in the chemistry. To use LED UV for inline coating, your varnish must be specifically formulated with photoinitiators that react to those specific long-wave UVA frequencies.
When managing a transition to LED, ensure your coating supplier provides a “high-reactivity” formula. Standard UV varnishes often remain tacky under LED light because they lack the UVC components needed for top-surface cross-linking.
Step 1: Substrate Preparation and Surface Tension
Before the varnish even hits the sheet or web, the substrate must be ready. This is particularly true for plastic labels and synthetic films used in narrow-web printing.
UV coatings have a specific surface tension, usually measured in dynes/cm. If the substrate’s surface energy is lower than the coating’s surface tension, the varnish will “bead up” or “crawl.” This results in the dreaded orange peel effect.
Measure your substrate with dyne pens before starting the run. Most UV coatings require a surface energy of at least 38 to 42 dynes/cm. If your material falls short, engage the corona treater. For inline offset coating on paperboard, ensure the inks used are “UV-receptive” to prevent adhesion failure between the ink layer and the varnish.
Step 2: Optimizing Anilox Selection for UV Varnish
In flexo and many offset coating units, an anilox roller meters the varnish. The cell volume (BCM) and line screen of the anilox determine the thickness of the coating layer.
- For High Gloss: Use a lower line screen with a higher BCM (8.0 to 10.0 BCM). A thicker layer allows the varnish to flow out and level before it hits the UV lamp.
- For Matte or Satin: A mid-range BCM (5.0 to 7.0) is usually sufficient.
- For Tactile or Grit Varnish: You need specialized large-cell anilox rollers to accommodate the larger particles in the fluid.
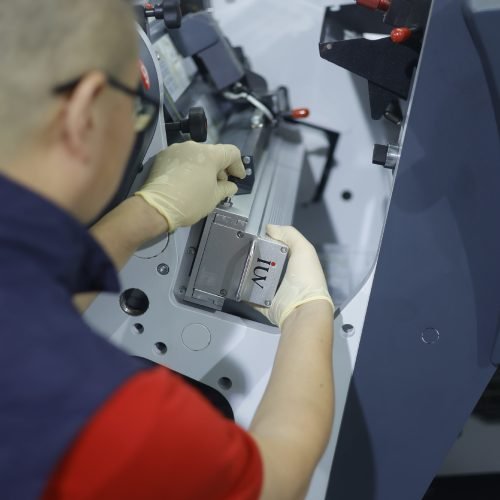
Managing the anilox is a “set and forget” trap. Varnish can dry in the cells during short stops, reducing the effective volume. Regular ultrasonic cleaning is a mandatory part of UV process management.
Step 3: Calibrating the Curing Window
Curing is not just about turning a lamp on. It is about the “Curing Window,” which consists of two metrics: Irradiance and Energy Density.
- Irradiance (Peak Power): This is the intensity of the light hitting the surface. It is measured in Watts/cm². High irradiance is necessary to initiate the chemical reaction and overcome oxygen inhibition at the surface.
- Energy Density (Dose): This is the total amount of light energy the coating receives over time. It is measured in Joules/cm². The dose determines the “through-cure” and adhesion to the substrate.
To manage this, use a UV radiometer. Run the radiometer through the press at various production speeds. If the dose drops too low at high speeds, you will get a “dry to touch” surface but the coating will flake off because the bottom layer is still liquid.
Step 4: Managing Heat and Cooling Systems
In narrow-web and label printing, heat management is as important as light output. Mercury lamps reach internal temperatures of over 800°C. If the cooling system—whether air or water—fails or is poorly maintained, the UV reflectors will warp.
Warped reflectors scatter the light rather than focusing it into a tight “focal point” on the web. This reduces the effective irradiance by up to 50%. Clean your reflectors weekly with isopropyl alcohol and check for signs of dulling or “blueing.” If you use LED systems, keep the chill rollers at the correct temperature to prevent the web from stretching under the high-intensity light.
Step 5: Troubleshooting Common Inline Coating Issues
Even with the best equipment, variables change. Here is how to handle the most common UV curing hurdles:
Lack of Adhesion
If the varnish peels off, the problem is usually under-curing at the base or a surface energy mismatch. Check the age of your lamps. Mercury lamps typically lose 10-15% of their output after 1,000 hours. If the lamps are new, increase the power or slow the press down to increase the UV dose.
Odor Issues
Uncured monomers produce a distinct, often unpleasant chemical smell. This is a major red flag in food packaging. Odor usually points to incomplete cross-linking. Verify that the press speed is not outrunning the lamp’s ability to provide a full dose.
Pinholing and Fish-Eyes
These small voids in the coating are usually caused by contamination. Silicone sprays used elsewhere in the shop are the primary culprit. Ensure the coating unit is a “silicone-free” zone. Also, check for foam in the varnish reservoir; micro-bubbles can survive the application process and pop just before curing.
Quality Control Tests for the Pressroom
You don’t need a laboratory to manage UV quality. Implement these three tests at the start of every shift:
- The Thumb Twist Test: Press your thumb firmly into the cured coating and twist. If the coating smears or moves, you have a through-cure problem.
- The Tape Test: Apply high-tack 610 or 810 Scotch tape to the cured varnish. Rub it down, then pull it off quickly at a 90-degree angle. No coating should be removed.
- The MEK Rub Test: For chemical-resistant coatings, soak a cotton swab in Methyl Ethyl Ketone (MEK) and rub the surface. A well-cured varnish should withstand 30 to 50 double-rubs before softening.
The Future of Inline UV Management
As sustainability becomes a priority, the move toward LED UV will accelerate. For the process engineer, this means tighter control over varnish viscosity and temperature. LED-curable varnishes are more sensitive to temperature fluctuations; a change of 5°C in the pressroom can significantly alter the flow characteristics of the varnish, affecting the gloss level.
Modern UV systems now offer “smart” integration. These systems communicate directly with the press PLC, adjusting lamp power automatically based on the web speed. Utilizing these features reduces waste and ensures that the first foot of a roll is as well-cured as the last.
By focusing on the synergy between anilox precision, lamp calibration, and chemical compatibility, you can turn inline UV coating from a bottleneck into a competitive advantage. Success in UV curing is found in the details—clean reflectors, fresh chemistry, and a calibrated light source. Keep these in balance, and your finishing quality will remain world-class.