Achieving 1-point type or 20-micron line widths in flexo label production requires more than just high-resolution plates. The transition from traditional mercury arc lamps to LED UV curing has redefined the technical boundaries of narrow web printing. While LED technology offers energy efficiency and thermal stability, tuning it for ultra-fine lines demands a deep understanding of photochemical reactions and mechanical precision.
Success in ultra-fine line flexography hinges on the balance between ink chemistry, press speed, and the specific output of the LED array. When lines are this thin, even a micro-second delay in polymerization can lead to dot gain or “wicking” on the substrate.
The Physics of LED UV: Irradiance vs. Energy Density
In narrow web printing, we must distinguish between irradiance and energy density. Irradiance refers to the “brightness” or intensity of the UV light at the surface. It is measured in W/cm². Energy density, or dose, is the total amount of UV energy the ink receives as it passes under the lamp, measured in mJ/cm².
For ultra-fine lines, high peak irradiance is critical. Fine lines have a high surface-area-to-volume ratio. This makes them extremely susceptible to oxygen inhibition. If the irradiance is too low, oxygen in the air will terminate the radical chain reaction before the ink hardens. This results in a “tacky” surface or blurred edges. To tune your system, ensure your LED lamps provide enough peak power to “punch through” the oxygen barrier instantly.
Matching Photoinitiators to Narrow-Band Wavelengths
Traditional mercury lamps emit a broad spectrum of UV light, from 200nm to 450nm. In contrast, LED lamps are monochromatic, usually peaking at 385nm or 395nm. If you are running an offset or flexo press, your ink must be specifically formulated for these wavelengths.
When printing ultra-fine lines, the ink’s photoinitiator package must be highly reactive. Because LED UV lacks the UVC (short-wave) component that typically handles surface cure, ink chemists use specialized phosphine oxides. If you notice fine lines spreading after they hit the substrate, the ink might not be reacting fast enough to the 395nm peak. You must work with your ink supplier to ensure the absorption spectrum of the ink aligns perfectly with the emission peak of your LED curing unit.
Managing Dot Gain with Instantaneous Polymerization
In flexographic label printing, dot gain is the enemy of detail. When the anilox roll transfers a microscopic amount of ink to the plate and then to the substrate, that ink wants to spread. In traditional curing, the heat from the lamps can actually lower the ink’s viscosity before it cures, increasing spread.
LED UV solves this by remaining cool. Because the diodes do not emit IR (infrared) radiation, the substrate stays at room temperature. This thermal stability is vital for narrow web converters using thin films or heat-sensitive liners. To tune for the finest lines, set your LED intensity to trigger polymerization the millisecond the ink leaves the final print station. This “pins” the dot in place, preventing the mechanical gain that occurs when wet ink sits on a non-porous surface.
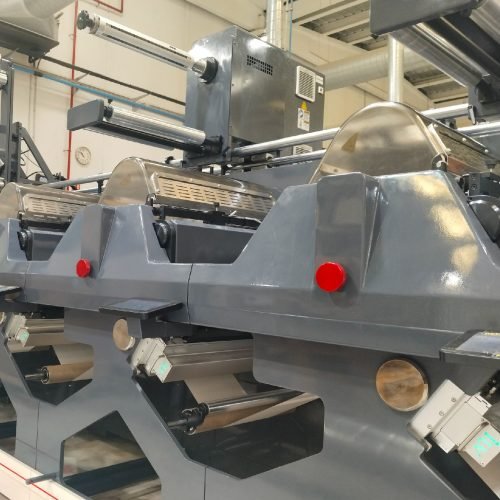
Anilox Selection and Ink Film Thickness
You cannot discuss curing without discussing the anilox roll. For ultra-fine lines, you need a high-count anilox with low volume (BCM). A lower ink film thickness is easier to cure because the UV photons can penetrate the entire layer almost instantaneously.
If your BCM is too high, the LED light might cure the surface but leave the bottom of the ink film liquid. This causes “scabbing” or poor adhesion. For fine-line work, aim for anilox volumes between 1.0 and 2.0 BCM. This thin film reacts better to the high irradiance of LED lamps. It allows for crisp edges and prevents the “bridging” of halftone dots in high-screen count jobs.
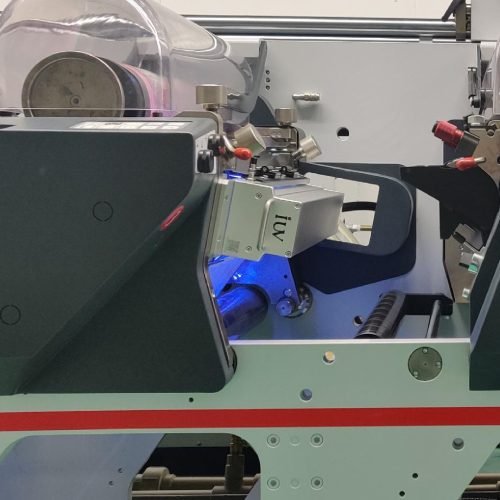
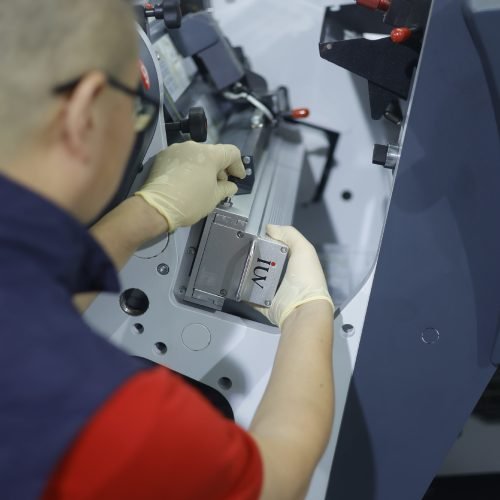
Mechanical Calibration: Distance and Angle
The distance between the LED array and the substrate is a primary tuning variable. Unlike mercury lamps that use reflectors to focus light, LEDs have a specific beam angle. Most LED curing systems are most effective at a distance of 5mm to 10mm from the web.
If the lamp is too far away, the irradiance drops according to the inverse square law. For ultra-fine lines, this loss of intensity allows oxygen to interfere with the cure. Ensure your lamp housings are mounted securely and parallel to the chill roll or impression cylinder. Even a slight tilt can cause uneven curing across the narrow web, leading to one side of the label looking sharper than the other.
Combating Oxygen Inhibition in Fine Line Work
Oxygen inhibition is the single biggest hurdle when moving to LED UV for fine-line flexo. Because the fine lines have so little mass, the presence of oxygen can easily stop the curing process.
One way to tune for this is the use of nitrogen inertion. By flooding the curing zone with nitrogen, you displace the oxygen. This allows the photoinitiators to work with much lower levels of UV energy. While nitrogen systems add cost, they are often the only way to achieve “offset-quality” fine lines on a flexo press. If nitrogen is not an option, you must compensate by increasing the concentration of surface-cure initiators in your UV ink.
Press Speed and Synchronization
Modern narrow web presses run at high speeds, often exceeding 150 meters per minute. Your LED system must be synchronized with the press speed. Most high-end LED controllers use a “proportional power” setting. As the press speeds up, the power to the LEDs increases.
However, tuning for ultra-fine lines requires testing the limits of this proportionality. At very high speeds, the “dwell time” (the time the ink spends under the light) decreases. If you are printing 2-point scripts or complex micro-patterns, you may need to cap your press speed to ensure the energy density (mJ/cm²) remains high enough for a total cure. Use a radiometer to map your “cure window”—the range of speeds where the ink passes both the tape test and the thumb twist test.
Substrate Surface Tension and Adhesion
The substrate plays a massive role in how fine lines appear after curing. If the surface energy of the substrate (measured in Dynes) is too low, the ink will bead up. If it is too high, the ink will spread excessively.
For LED UV applications, the substrate should typically have a Dyne level 7-10 points higher than the ink’s surface tension. When tuning for fine lines, use a corona treater to stabilize the substrate surface before it reaches the print stations. A stable surface ensures that the fine-line geometry remains intact from the plate to the LED lamp.
Troubleshooting Common LED Curing Issues
When fine lines appear “fuzzy” or lack definition under a loupe, check these three factors:
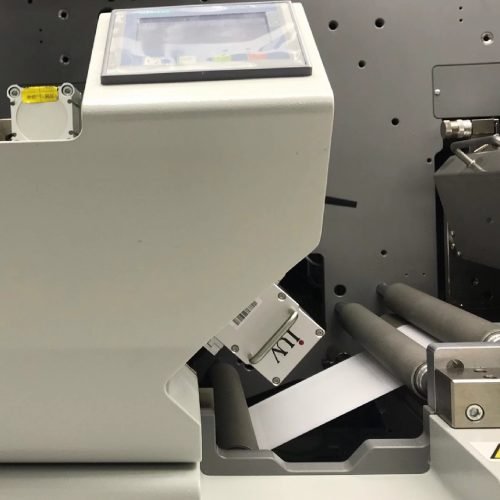
- Window Cleanliness: LED arrays are protected by quartz glass. Any ink mist or dust on this glass will scatter the UV light, reducing irradiance and softening your fine-line edges.
- Diode Degradation: While LEDs last 20,000 hours, individual diodes can fail. If a section of the array is dim, you will see inconsistent curing. Use a UV map to check for “dead zones.”
- Ink Age: UV inks can undergo “dark growth” or polymerization in the bucket over time. Old ink becomes more viscous and may not flow correctly through a high-count anilox, leading to jagged fine lines.
Conclusion: The Precision Approach
Tuning LED UV for ultra-fine line printing is an exercise in synchronization. It requires the harmony of ink chemistry, mechanical alignment, and optical power. By focusing on high irradiance to overcome oxygen inhibition and maintaining a thin ink film via precise anilox selection, narrow web converters can produce labels that rival the quality of traditional offset printing.
The lack of heat in the LED process allows for tighter registration and better material handling, but the engineer must remain vigilant about the spectral match between the lamp and the ink. When these variables are controlled, the result is a sharp, durable, and highly detailed print that meets the most demanding brand standards.